Introduction to Burnt Basque Cheesecake
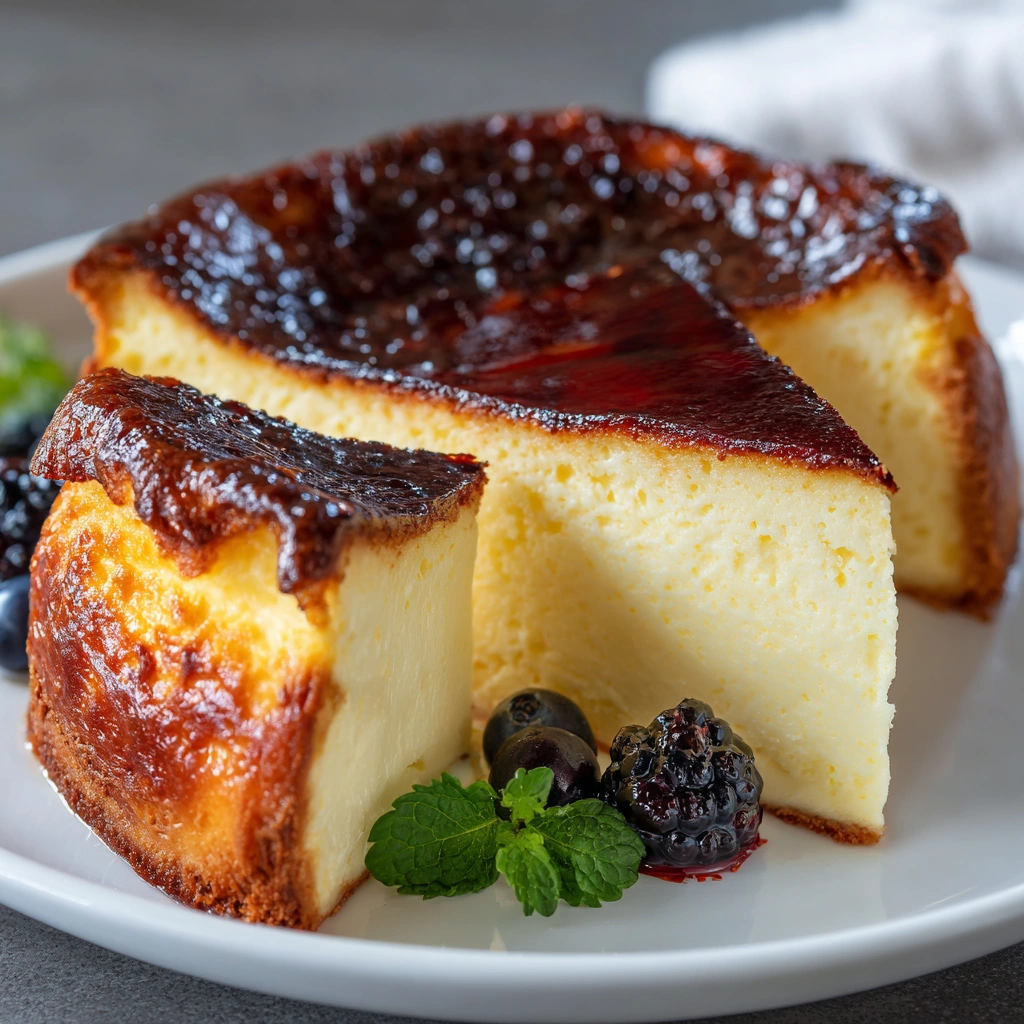
Have you ever craved a dessert that feels like a warm hug? The Burnt Basque Cheesecake is just that! This rich and creamy delight, with its unique burnt top, is not only a feast for the eyes but also a treat for the taste buds. Perfect for busy moms and professionals, this cheesecake is a quick solution for a sweet ending to your day. Whether you’re celebrating a special occasion or just want to impress your loved ones, this recipe will surely become a favorite in your kitchen. Let’s dive into this culinary adventure together!
Why You’ll Love This Burnt Basque Cheesecake
This Burnt Basque Cheesecake is a game-changer for anyone short on time but big on flavor. It’s incredibly easy to whip up, requiring just a handful of ingredients and minimal prep. The rich, creamy texture paired with that signature burnt top creates a taste sensation that’s simply irresistible. Plus, it’s a showstopper that will have your family and friends raving, making it perfect for any gathering!
Ingredients for Burnt Basque Cheesecake
Gathering the right ingredients is the first step to creating your masterpiece. Here’s what you’ll need for this delightful Burnt Basque Cheesecake:
- Cream Cheese: The star of the show! It gives the cheesecake its rich and creamy texture. Make sure it’s at room temperature for easy mixing.
- Heavy Cream: This adds a luscious creaminess that makes each bite melt in your mouth. You can substitute with full-fat sour cream if needed.
- Granulated Sugar: Sweetness is key! It balances the tanginess of the cream cheese. Feel free to use coconut sugar for a healthier twist.
- Large Eggs: They provide structure and richness. Room temperature eggs blend better, so take them out ahead of time.
- Vanilla Extract: A splash of this adds warmth and depth to the flavor. Pure vanilla is best, but imitation works in a pinch.
- All-Purpose Flour: Just a touch helps stabilize the cheesecake. If you’re gluten-free, almond flour can be a great alternative.
For exact measurements, check the bottom of the article where you can find everything listed for easy printing. Happy baking!
How to Make Burnt Basque Cheesecake
Now that you have your ingredients ready, let’s get to the fun part—making this delicious Burnt Basque Cheesecake! Follow these simple steps, and you’ll be on your way to a dessert that will wow everyone.
Step 1: Preheat the Oven
First things first, preheat your oven to 400°F (200°C). Preheating is crucial because it ensures that your cheesecake bakes evenly. A hot oven helps achieve that beautiful burnt top while keeping the inside creamy and luscious. Trust me, this step is non-negotiable!
Step 2: Prepare the Cream Cheese Mixture
In a large bowl, beat the cream cheese until it’s smooth and creamy. This step is vital because it sets the foundation for your cheesecake’s texture. If the cream cheese is lumpy, your cheesecake will be too. So, take your time here and make sure it’s perfectly blended!
Step 3: Combine Ingredients
Next, add the heavy cream and granulated sugar to the bowl. Mix everything together until well combined. The heavy cream adds richness, while the sugar balances the tanginess of the cream cheese. You want a smooth mixture that looks inviting and delicious!
Step 4: Add Eggs
Now, it’s time to incorporate the eggs. Add them one at a time, mixing well after each addition. This step is important because it helps create a light and airy texture. If you dump all the eggs in at once, you risk overmixing, which can lead to a dense cheesecake.
Step 5: Stir in Vanilla and Flour
Once the eggs are fully incorporated, stir in the vanilla extract and flour until just combined. Be careful not to overmix! You want to keep that lovely creamy texture without adding too much air. A gentle fold is all you need here.
Step 6: Pour into Pan
Now, pour the batter into a parchment-lined springform pan. The parchment paper makes it easier to remove the cheesecake later. Make sure to spread the batter evenly, so it bakes uniformly. This is where the magic starts to happen!
Step 7: Bake the Cheesecake
Place the pan in the preheated oven and bake for 25-30 minutes. Keep an eye on it! You want the top to be dark brown, almost burnt, while the center remains slightly jiggly. This contrast is what makes the Burnt Basque Cheesecake so special.
Step 8: Cooling and Refrigeration
Once baked, let the cheesecake cool at room temperature for about an hour. After that, refrigerate it for at least 4 hours, or overnight if you can wait! Chilling is essential because it allows the flavors to meld and the texture to set perfectly. Trust me, the wait is worth it!
Tips for Success
- Always use room temperature ingredients for a smoother batter.
- Don’t overmix! This keeps your cheesecake creamy and prevents it from becoming dense.
- Line your springform pan with parchment paper for easy removal.
- Check for doneness by looking for a dark brown top and a slightly jiggly center.
- Let it cool completely before refrigerating for the best texture.
Equipment Needed
- Springform Pan: Essential for easy removal. A regular cake pan works too, but it may be trickier to serve.
- Mixing Bowls: Use a large bowl for mixing. A stand mixer can save time, but a hand mixer works just as well.
- Whisk or Electric Mixer: For beating the cream cheese. A whisk is great for a workout, but an electric mixer makes it easier.
- Parchment Paper: Helps with easy removal. If you don’t have any, greasing the pan will do.
Variations of Burnt Basque Cheesecake
- Chocolate Burnt Basque Cheesecake: Add melted dark chocolate to the batter for a rich, chocolatey twist that will satisfy any chocolate lover.
- Citrus Zest: Incorporate lemon or orange zest into the batter for a refreshing citrus flavor that brightens up the cheesecake.
- Gluten-Free Option: Substitute all-purpose flour with almond flour or a gluten-free flour blend to make this dessert suitable for gluten-sensitive friends.
- Berry Swirl: Before baking, swirl in a homemade berry compote for a fruity burst of flavor and a beautiful presentation.
- Spiced Version: Add a pinch of cinnamon or nutmeg to the batter for a warm, spiced flavor that’s perfect for fall gatherings.
Serving Suggestions for Burnt Basque Cheesecake
- Fresh Berries: Serve with a side of mixed berries for a pop of color and freshness.
- Coffee or Espresso: Pair with a rich cup of coffee or espresso to enhance the cheesecake’s flavors.
- Fruit Compote: Drizzle with a homemade fruit compote for added sweetness and a beautiful presentation.
- Whipped Cream: A dollop of lightly sweetened whipped cream adds a lovely touch.
- Chocolate Sauce: For chocolate lovers, a drizzle of chocolate sauce can elevate the dessert experience.
FAQs about Burnt Basque Cheesecake
What makes Burnt Basque Cheesecake different from regular cheesecake?
The unique burnt top of the Burnt Basque Cheesecake sets it apart. This caramelized layer adds a depth of flavor and a beautiful contrast to the creamy interior. It’s a delightful twist on traditional cheesecake that’s sure to impress!
Can I make Burnt Basque Cheesecake ahead of time?
Absolutely! In fact, making it a day in advance is ideal. The flavors meld beautifully as it chills in the refrigerator, enhancing the overall taste. Just be sure to cover it well to keep it fresh!
How do I store leftovers?
Store any leftover cheesecake in an airtight container in the refrigerator. It will stay fresh for up to five days. Just remember to let it sit at room temperature for a few minutes before serving for the best texture.
Can I freeze Burnt Basque Cheesecake?
Yes, you can freeze it! Wrap individual slices tightly in plastic wrap and then place them in a freezer-safe container. It can be frozen for up to three months. Thaw in the refrigerator overnight before enjoying!
What can I serve with Burnt Basque Cheesecake?
This cheesecake pairs wonderfully with fresh berries, a drizzle of fruit compote, or a dollop of whipped cream. A cup of coffee or espresso also complements the rich flavors beautifully!
Final Thoughts
Creating a Burnt Basque Cheesecake is more than just baking; it’s an experience filled with joy and satisfaction. The moment you pull that beautifully burnt top from the oven, you’ll feel a rush of pride. Each creamy slice is a testament to your culinary adventure, perfect for sharing with family and friends. Whether it’s a special occasion or a simple weeknight treat, this cheesecake brings smiles and happy memories. So, roll up your sleeves, embrace the process, and enjoy every delicious bite. Trust me, this recipe will become a cherished favorite in your home!
Print
Burnt Basque Cheesecake: Discover the Secret Recipe!
- Prep Time: 20 minutes
- Cook Time: 30 minutes
- Total Time: 4 hours 50 minutes
- Yield: 8 servings 1x
- Category: Dessert
- Method: Baking
- Cuisine: Spanish
- Diet: Vegetarian
Description
A rich and creamy cheesecake with a unique burnt top, originating from the Basque region of Spain.
Ingredients
- 2 cups cream cheese
- 1 cup heavy cream
- 1 cup granulated sugar
- 4 large eggs
- 1 teaspoon vanilla extract
- 1/4 cup all-purpose flour
Instructions
- Preheat the oven to 400°F (200°C).
- In a large bowl, beat the cream cheese until smooth.
- Add the heavy cream and sugar, mixing until well combined.
- Incorporate the eggs one at a time, mixing well after each addition.
- Stir in the vanilla extract and flour until just combined.
- Pour the batter into a parchment-lined springform pan.
- Bake for 25-30 minutes until the top is dark brown and the center is slightly jiggly.
- Let it cool at room temperature before refrigerating for at least 4 hours.
- Serve chilled and enjoy!
Notes
- For best results, use room temperature ingredients.
- Do not overmix the batter to avoid incorporating too much air.
- Can be served with fresh berries or a fruit compote.
Nutrition
- Serving Size: 1 slice
- Calories: 400
- Sugar: 25g
- Sodium: 200mg
- Fat: 30g
- Saturated Fat: 18g
- Unsaturated Fat: 8g
- Trans Fat: 0g
- Carbohydrates: 30g
- Fiber: 0g
- Protein: 6g
- Cholesterol: 150mg