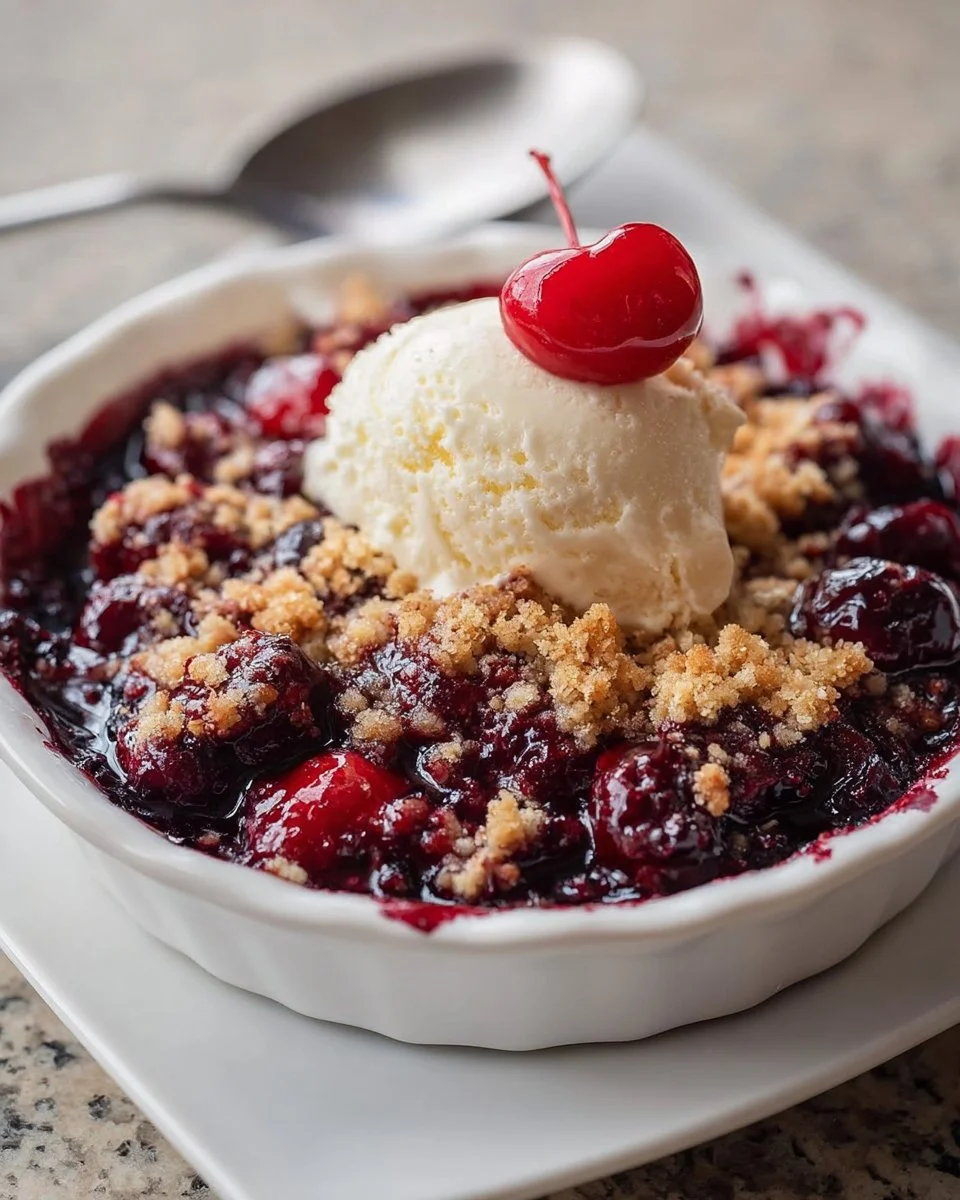
The warm, inviting aroma wafts through your kitchen, enticing your senses with a promise of something delightful. Picture this: a thick layer of juicy cherries bubbling away beneath a golden-brown, crunchy topping just waiting to be dug into. The anticipation builds as the oven works its magic, transforming humble ingredients into a beautiful, rustic dessert that feels like a hug on a plate. This Easy Homemade Cherry Crumble isn’t merely a dish; it’s an experience—one that envelops you in sweet, fruity bliss with every spoonful.
With each bite, your taste buds awaken to a medley of flavors. The sweetness of cherries swirls together with a subtle tang from the lemon juice, creating a refreshing balance that dances on your palate. The crumble topping, crunchy yet tender, offers a satisfying contrast to the lush fruit beneath. Its buttery richness complements the cherries perfectly, creating a harmony of textures that evokes memories of warm summer afternoons spent savouring nature’s bounty.
Whether you’re gathering with friends for a cozy get-together or yearning for a comforting dessert after a long day, this cherry crumble shines. Its simplicity invites personalization, while its flavor appeals universally, from grandmas to kids. Each bite brings a rush of nostalgia, reminding you of home and warmth, making it the perfect treat for any occasion.
Why You’ll Love This Easy Homemade Cherry Crumble
This Easy Homemade Cherry Crumble enchants with its ability to evoke feelings of comfort while delighting your taste buds. You’ll love it for many reasons:
-
Irresistible Flavor: The combination of sweet, juicy cherries and a crunchy, buttery topping creates a mouthwatering explosion of taste. Each spoonful promises a delightful dance between sweetness and tartness.
-
Simplicity at Its Best: With just a handful of ingredients and steps, this crumble proves that incredible desserts don’t require hours in the kitchen. It fits perfectly into your busy schedule while still impressing guests.
-
Versatile Deliciousness: Whether served warm with a dollop of vanilla ice cream, drizzled with homemade whipped cream, or on its own, this crumble adapts to your preferences and enriches every meal.
-
Seasonal Joy: Use fresh cherries when in season, or turn to frozen ones once they’re out of reach. This dessert allows you to enjoy a taste of summer year-round.
Gather around the table with friends or family, share this enchanting treat, and create memories that linger long after the last crumb has been savoured.
Preparation Phase & Tools to Use
Before diving into the world of cherries and crumble, let’s gather some essential tools that will elevate your baking experience. Each tool plays a significant role in ensuring your cherry crumble turns out perfectly every time.
-
Mixing Bowls: A good set of mixing bowls is crucial for combining your ingredients. Choose bowls that are sturdy enough to withstand vigorous mixing.
-
Baking Dish: Use a 9-inch square or similar size baking dish. This ensures an even bake—no one wants soggy bottoms on their crumble!
-
Measuring Cups and Spoons: Reliable measuring tools help to achieve the right balance of flavors. Precision makes a difference, especially in baking.
-
Pastry Cutter: This handy tool is ideal for cutting in butter to create the crumble’s perfect texture without overworking the dough.
-
Oven Mitts: Safety first! Protect those hands while pulling out that bubbling, deliciousness from the oven.
Preparation tips: Spend a moment picking through your cherries if using fresh ones. Remove stems and pits to harness pure cherry goodness. If you choose frozen cherries, ensure you thaw them and drain any excess juice to avoid a soggy crumble.
Ingredients for Easy Homemade Cherry Crumble
The ingredient list is wonderfully simple yet allows you to showcase the magnificent cherries. Here’s what you’ll need to create this mouthwatering dessert:
-
2 cups fresh or frozen cherries: The star ingredient, with their vibrant color and luscious taste. You can substitute with other berries like blueberries or raspberries for a different twist.
-
1/2 cup granulated sugar: White sugar enhances the natural sweetness of the cherries. For a healthier option, consider using coconut sugar or a sugar substitute.
-
1 tablespoon lemon juice: This adds a zesty brightness that cuts through the sweetness and elevates the overall flavor profile.
-
1 cup rolled oats: A key element of the crumble topping, oats bring a wholesome, chewy texture. Swap with gluten-free oats for a gluten-free version.
-
1/2 cup all-purpose flour: This helps to bind the topping together, giving it that perfect crumble. Whole wheat flour can be a flavorful alternative.
-
1/3 cup brown sugar: Dark or light, brown sugar introduces a beautiful caramel note to the topping. If unavailable, more granulated sugar can be used, though it will alter the flavor slightly.
-
1/2 teaspoon cinnamon: A warm spice that complements the flavors wonderfully. Feel free to experiment with nutmeg or allspice for a unique taste.
-
1/4 cup cold butter: Cut into small cubes, butter enhances the richness of the crumble. Vegan butter works just as beautifully if you’re looking for a dairy-free option.
Armed with these ingredients, you stand ready to embark upon a delightful baking adventure!
How to Make Easy Homemade Cherry Crumble
Now, let’s dive into the fun part—making that scrumptious cherry crumble. With these simple steps, you’ll soon have a heavenly dessert straight from your oven.
-
Preheat your oven to 350°F (175°C). This ensures that your crumble bakes evenly and turns golden brown.
-
In a mixing bowl, combine the cherries, granulated sugar, and lemon juice. Toss everything gently to coat the cherries, then spread the mixture into your greased baking dish, ensuring an even layer for uniform cooking.
-
In another bowl, mix together the oats, flour, brown sugar, and cinnamon. This fragrant blend will form the crumble topping. Next, cut in the cold butter using a pastry cutter or your fingertips until the mixture resembles coarse crumbs. Aim for pebble-sized lumps that will create those coveted crispy bits.
-
Sprinkle the oat mixture evenly over the cherries, covering them generously with a crunchy layer. The more crumble the better—who doesn’t love that texture?
-
Bake for 30-35 minutes, until the top turns a golden brown, and the cherries bubble up around the edges, releasing their sweet aroma that fills your home with warmth.
-
Once done, let it cool slightly before serving. This resting period allows the juices to settle and makes serving easier.
Each of these steps brings you closer to enjoying all the flavors and textures of this fantastic cherry crumble.
Chef’s Notes & Helpful Tips
Feeling inspired to tweak the recipe? Here are some ideas to customize your Easy Homemade Cherry Crumble to your liking!
-
Make-Ahead Technique: You can prepare the cherry filling a day in advance and store it in the fridge. Assemble the crumble topping when you’re ready to bake. This allows for an easy and fresh dessert on demand.
-
Cooking Alternatives: Consider using an air fryer for a quicker option! Bake at 320°F (160°C) for about 20-25 minutes, checking for that golden-brown topping.
-
Customization Ideas: Explore various fruits! Peaches, apples, or even mixed berries work splendidly here. You can also jazz up your crumble with chopped nuts or coconut flakes for a delightful twist.
Common Mistakes to Avoid
Even the best can stumble! Here’s what to watch out for to ensure your crumble is nothing short of outstanding:
-
Using Overripe or Underripe Cherries: Ripe cherries offer the best flavor, while overripe ones may turn mushy. Ensure they’re plump and firm for optimal taste and texture.
-
Not Greasing the Baking Dish: A greased dish is essential to prevent sticking and make serving a breeze. Don’t skip this step!
-
Overmixing the Crumble: When combining the butter with dry ingredients, mix just until crumbly. Overworking it can lead to a tough topping—nobody wants that!
-
Skipping the Cooling Period: Resist the temptation to dive right in! Allowing it to cool helps the juices thicken and makes for easier serving.
Take heed of these tips to elevate your cherry crumble experience to the next level.
What to Serve With Easy Homemade Cherry Crumble
The beauty of this cherry crumble is its versatility. Pair it with various accompaniments to elevate your dessert experience:
-
Vanilla Ice Cream: The classic pairing! A scoop of creamy vanilla ice cream melting over warm crumble enhances its indulgence.
-
Whipped Cream: Light and airy, this adds a touch of sweetness that complements the tartness of the cherries beautifully.
-
Greek Yogurt: For a healthier twist, serve with a dollop of Greek yogurt, adding a creamy tang that balances the sweetness.
-
Custard: Pour warm custard over individual servings to elevate the flavor and creamy texture—a heavenly combination!
-
Spiced Tea or Coffee: Enjoy a piping hot cup alongside your crumble for a comforting experience, perfect for chilly evenings.
-
Fresh Mint Leaves: Garnish with fresh mint for a refreshing finish, adding a fragrant burst of flavor that pairs wonderfully with cherries.
Each of these options enhances the cherry crumble experience and invites you into a world of indulgence.
Storage & Reheating Instructions
Wondering how to keep your leftovers fresh? Here’s the scoop:
-
Fridge: Store your cherry crumble in an airtight container in the fridge for up to three days. Reheat individual portions in the microwave or place in the oven at 350°F (175°C) until warmed through.
-
Freezer: For longer storage, freeze the baked crumble in an airtight container for up to three months. To reheat, thaw overnight in the fridge and then bake at 350°F (175°C) for about 25 minutes until warmed throughout.
With these simple tips, you can enjoy your cherry crumble long after baking it!
Estimated Nutrition Information
Indulge with confidence! Here’s what you can expect per serving (approximately):
- Calories: 300
- Total Fat: 15g
- Saturated Fat: 8g
- Cholesterol: 30mg
- Sodium: 150mg
- Total Carbohydrates: 43g
- Dietary Fiber: 4g
- Sugars: 20g
- Protein: 3g
*Nutrition values are approximate and can vary based on ingredient brands and variations used.
FAQs
Can I use other fruits instead of cherries?
Absolutely! This crumble recipe is versatile. Feel free to substitute with blueberries, raspberries, or even diced peaches. Each fruit brings its unique sweetness and flavor.
Can I make this recipe gluten-free?
Yes! Use gluten-free oats and a gluten-free flour blend instead of all-purpose flour. The result will still deliver a deliciously crunchy topping!
How can I add a nutty flavor to my crumble?
Incorporate chopped nuts like almonds or pecans into the topping before baking. Not only do they offer extra flavor, but they also give a delightful crunch!
Is there a vegan option for this crumble?
Certainly! Replace the butter with a vegan butter alternative and make sure that your sugar is vegan-friendly. The crumble will still turn out deliciously!
How do I know when my cherry crumble is done?
Look for a beautifully golden-brown topping and bubbling juices around the edges. If you insert a fork or knife, the topping should feel crumbly yet set.
Let the aroma of this Easy Homemade Cherry Crumble entice you into the kitchen, where delectable moments await. As you savor each spoonful, let the combination of sweet cherries and crunchy topping whisk you away to sweet memories of home and happiness. Trust me; this delightful dessert begs to be shared, and once you take your first bite, you’ll be transported to that blissful state of cherry-filled warmth that keeps you reaching for more. Dive in and enjoy every crumb!
Print
Easy Homemade Cherry Crumble
- Prep Time: 15 minutes
- Cook Time: 35 minutes
- Total Time: 50 minutes
- Yield: 6 servings 1x
- Category: Dessert
- Method: Baking
- Cuisine: American
- Diet: Vegetarian
Description
A warm and inviting cherry crumble featuring juicy cherries topped with a crunchy, buttery crumble, perfect for any occasion.
Ingredients
- 2 cups fresh or frozen cherries
- 1/2 cup granulated sugar
- 1 tablespoon lemon juice
- 1 cup rolled oats
- 1/2 cup all-purpose flour
- 1/3 cup brown sugar
- 1/2 teaspoon cinnamon
- 1/4 cup cold butter
Instructions
- Preheat your oven to 350°F (175°C).
- Combine the cherries, granulated sugar, and lemon juice in a mixing bowl. Toss gently and spread into a greased baking dish.
- Mix together oats, flour, brown sugar, and cinnamon in another bowl.
- Cut in the cold butter using a pastry cutter until the mixture resembles coarse crumbs.
- Sprinkle the oat mixture evenly over the cherries.
- Bake for 30-35 minutes until golden brown and bubbling.
- Cool slightly before serving.
Notes
For variations, consider using other fruits or adding nuts to the crumble topping.
Nutrition
- Serving Size: 1 serving
- Calories: 300
- Sugar: 20g
- Sodium: 150mg
- Fat: 15g
- Saturated Fat: 8g
- Unsaturated Fat: 7g
- Trans Fat: 0g
- Carbohydrates: 43g
- Fiber: 4g
- Protein: 3g
- Cholesterol: 30mg